> ## Documentation Index
> Fetch the complete documentation index at: https://docs.elkapi.com/llms.txt
> Use this file to discover all available pages before exploring further.

# OpenClaw Manager — Telegram チャネル設定

> OpenClaw Manager で Telegram ボットを作成・設定する手順を詳しく解説。BotFather でのボット作成、認証情報の入力、ペアリングコード連携までの完全ガイド。

## はじめに

このチュートリアルでは、OpenClaw Manager で Telegram ボットを作成・設定する手順を説明します。設定完了後、Telegram Bot が ElkAPI の AI モデルを使用して、ユーザーとインテリジェントな会話を行えるようになります。

<Note>
  **前提条件：** [OpenClaw Manager のデプロイ](/ja/integrations/platform/openclaw-manager)が完了し、Manager が起動中で管理画面にアクセスできることをご確認ください。
</Note>

## ステップ 1：Telegram で Bot を作成

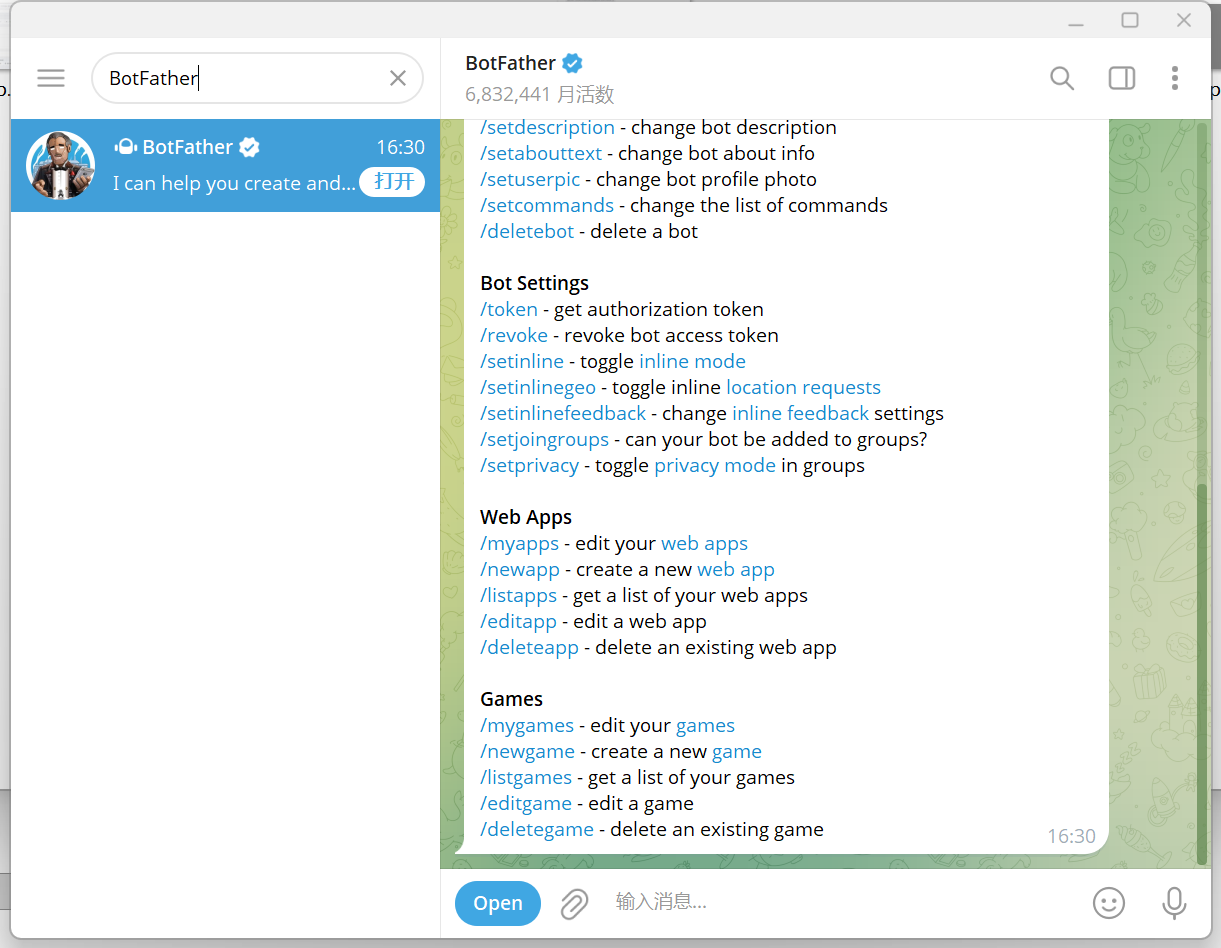
1. Telegram を開き、[@BotFather](https://t.me/BotFather) を検索して会話を開始
<Frame>
  <img src="https://mintcdn.com/apicore/LGVVJQGJwbbJu2RM/images/integrations/openclaw-manager/telegram/botfather-search.png?fit=max&auto=format&n=LGVVJQGJwbbJu2RM&q=85&s=63320eeb5130eaea975495553576c905" alt="BotFather を検索" width="1221" height="948" data-path="images/integrations/openclaw-manager/telegram/botfather-search.png" />
</Frame>

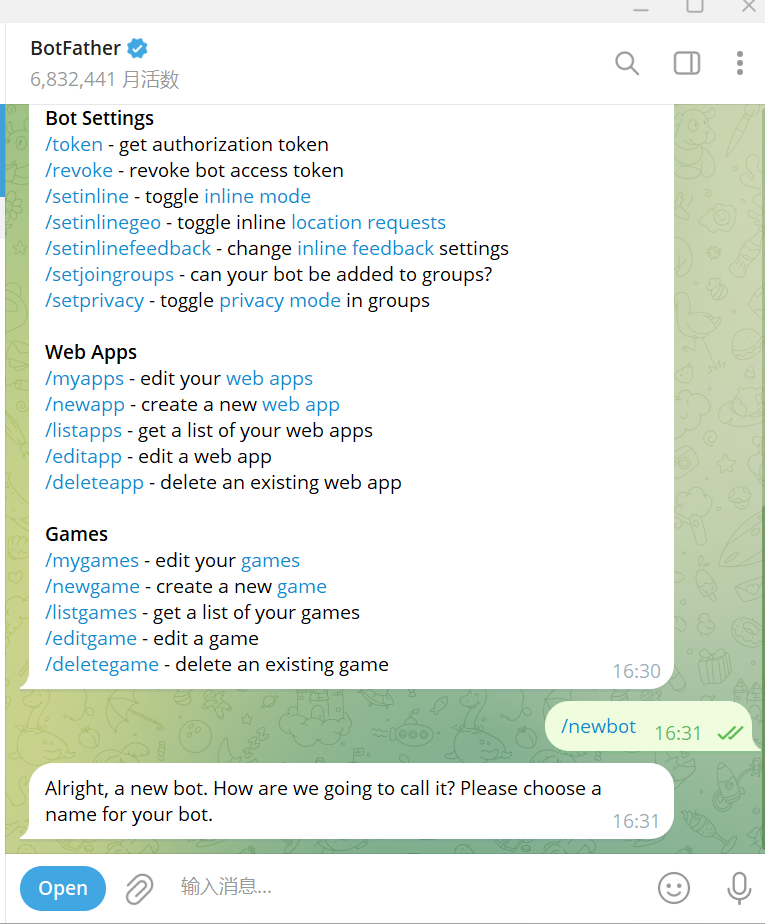
2. `/newbot` コマンドを送信

<Frame>
  <img src="https://mintcdn.com/apicore/LGVVJQGJwbbJu2RM/images/integrations/openclaw-manager/telegram/botfather-newbot.png?fit=max&auto=format&n=LGVVJQGJwbbJu2RM&q=85&s=9daa1fab7fd6d89ff6203a9c032a92fc" alt="/newbot コマンドを送信" width="765" height="924" data-path="images/integrations/openclaw-manager/telegram/botfather-newbot.png" />
</Frame>

<caption>*/newbot を送信してボット作成を開始*</caption>

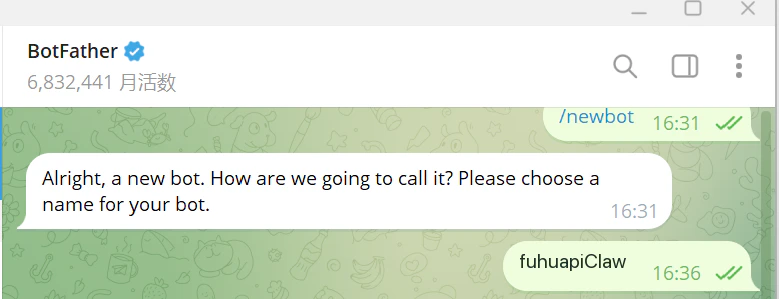
3. 指示に従ってボットの**表示名**を入力（例：`My AI Bot`）

<Frame>
  <img src="https://mintcdn.com/fuhu/rGvMBqASJ4r9KbNS/images/integrations/openclaw-manager/telegram/botfather-name.png?fit=max&auto=format&n=rGvMBqASJ4r9KbNS&q=85&s=d6c755aad5869306c2df791af6f7dc75" alt="ボット名を入力" width="779" height="299" data-path="images/integrations/openclaw-manager/telegram/botfather-name.png" data-path="images/integrations/openclaw-manager/telegram/botfather-name.png" />
</Frame>

<caption>*ボットの表示名を入力*</caption>

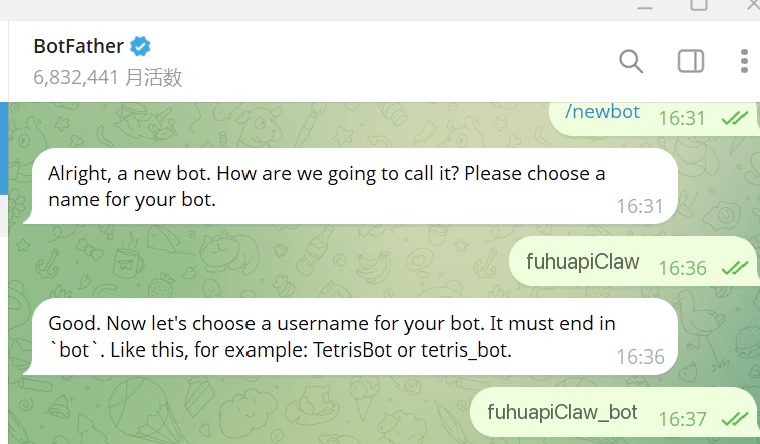
4. ボットの**ユーザー名**を入力（`bot` で終わる必要あり、例：`my_ai_chatbot`）

<Frame>
  <img src="https://mintcdn.com/fuhu/rGvMBqASJ4r9KbNS/images/integrations/openclaw-manager/telegram/botfather-username.png?fit=max&auto=format&n=rGvMBqASJ4r9KbNS&q=85&s=99d3eeff5ec1c2d7f60597123c898c54" alt="ボットユーザー名を入力" width="760" height="444" data-path="images/integrations/openclaw-manager/telegram/botfather-username.png" data-path="images/integrations/openclaw-manager/telegram/botfather-username.png" />
</Frame>

<caption>*ボットのユーザー名を入力（bot で終わる必要あり）*</caption>

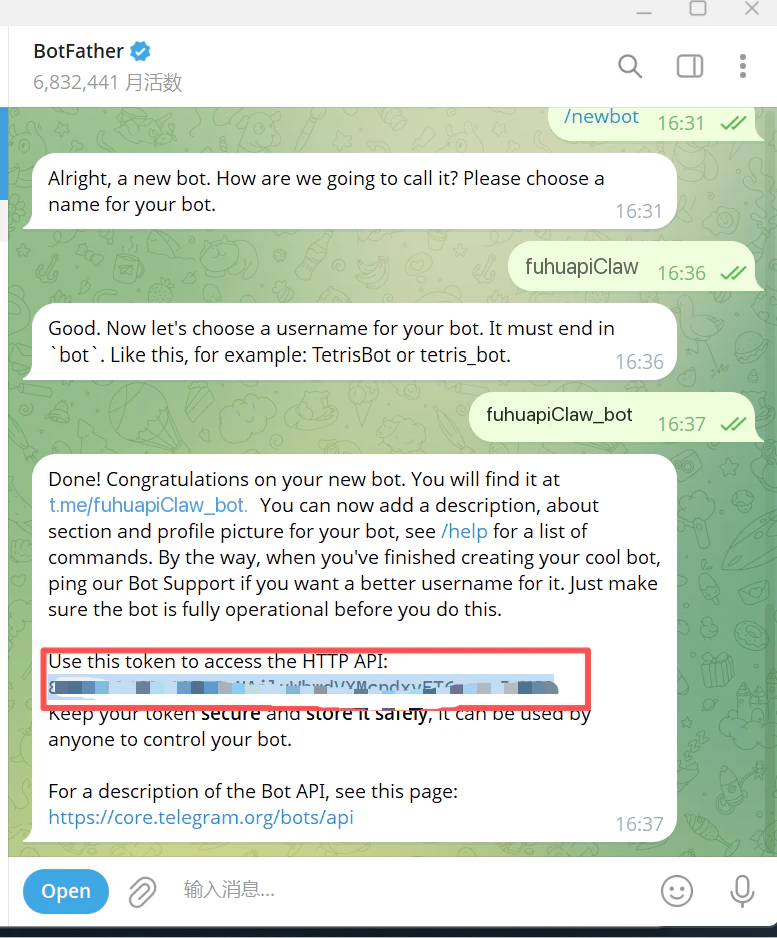
5. BotFather が **Bot Token** を返します（形式：`123456:ABC-DEF1234ghIkl-zyx57W2v1u123ew11`）、コピーして保存

<Frame>
  <img src="https://mintcdn.com/fuhu/rGvMBqASJ4r9KbNS/images/integrations/openclaw-manager/telegram/botfather-token.png?fit=max&auto=format&n=rGvMBqASJ4r9KbNS&q=85&s=ccb0d6e4a36baafe77bae4152cb253c2" alt="Bot Token を取得" width="777" height="938" data-path="images/integrations/openclaw-manager/telegram/botfather-token.png" data-path="images/integrations/openclaw-manager/telegram/botfather-token.png" />
</Frame>

<caption>*BotFather が返した Bot Token*</caption>

<Warning>
  **Bot Token を安全に保管してください**。漏洩した場合は、BotFather で `/revoke` コマンドを使用して再生成してください。
</Warning>

## ステップ 2：Manager でインスタンスを作成

1. OpenClaw Manager 管理画面を開く（`http://127.0.0.1:51942`）

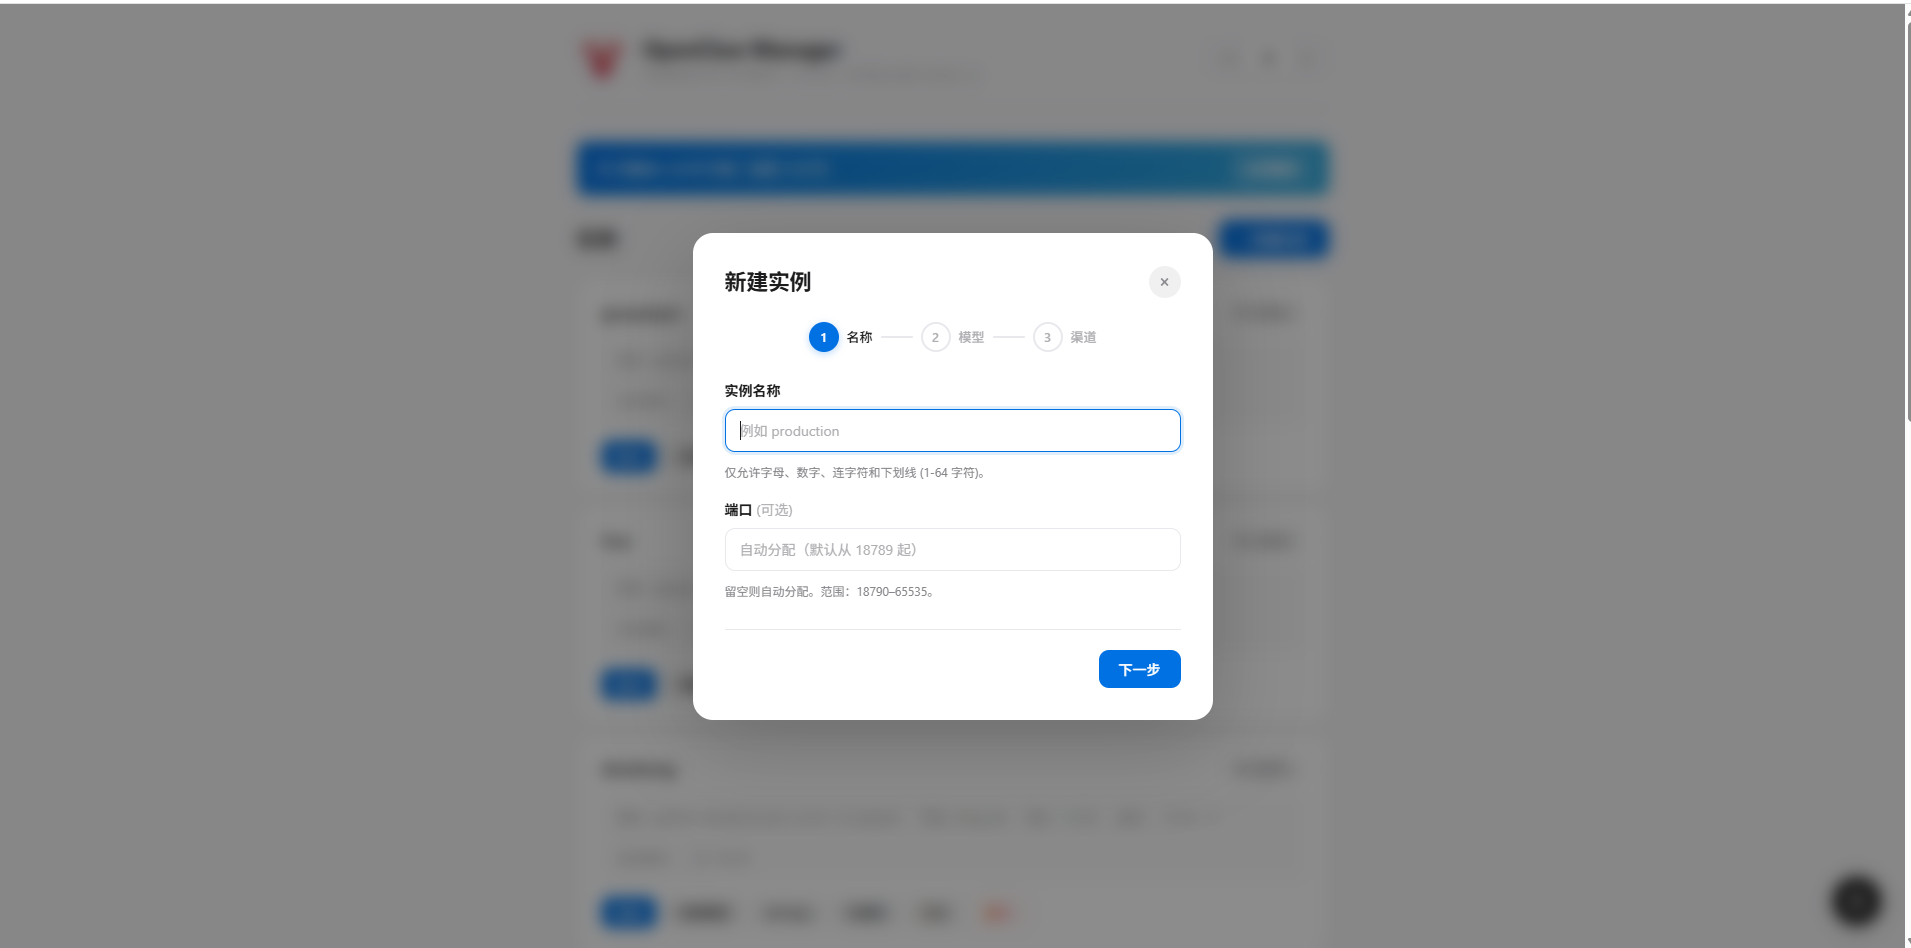
2. **+ 新規インスタンス** をクリック

<Frame>
  <img src="https://mintcdn.com/apicore/LGVVJQGJwbbJu2RM/images/integrations/openclaw-manager/manager/new-instance.png?fit=max&auto=format&n=LGVVJQGJwbbJu2RM&q=85&s=f8ce08b7a5ff98c4ec954b4eeae5a9a5" alt="新規インスタンス" width="1911" height="948" data-path="images/integrations/openclaw-manager/manager/new-instance.png" />
</Frame>

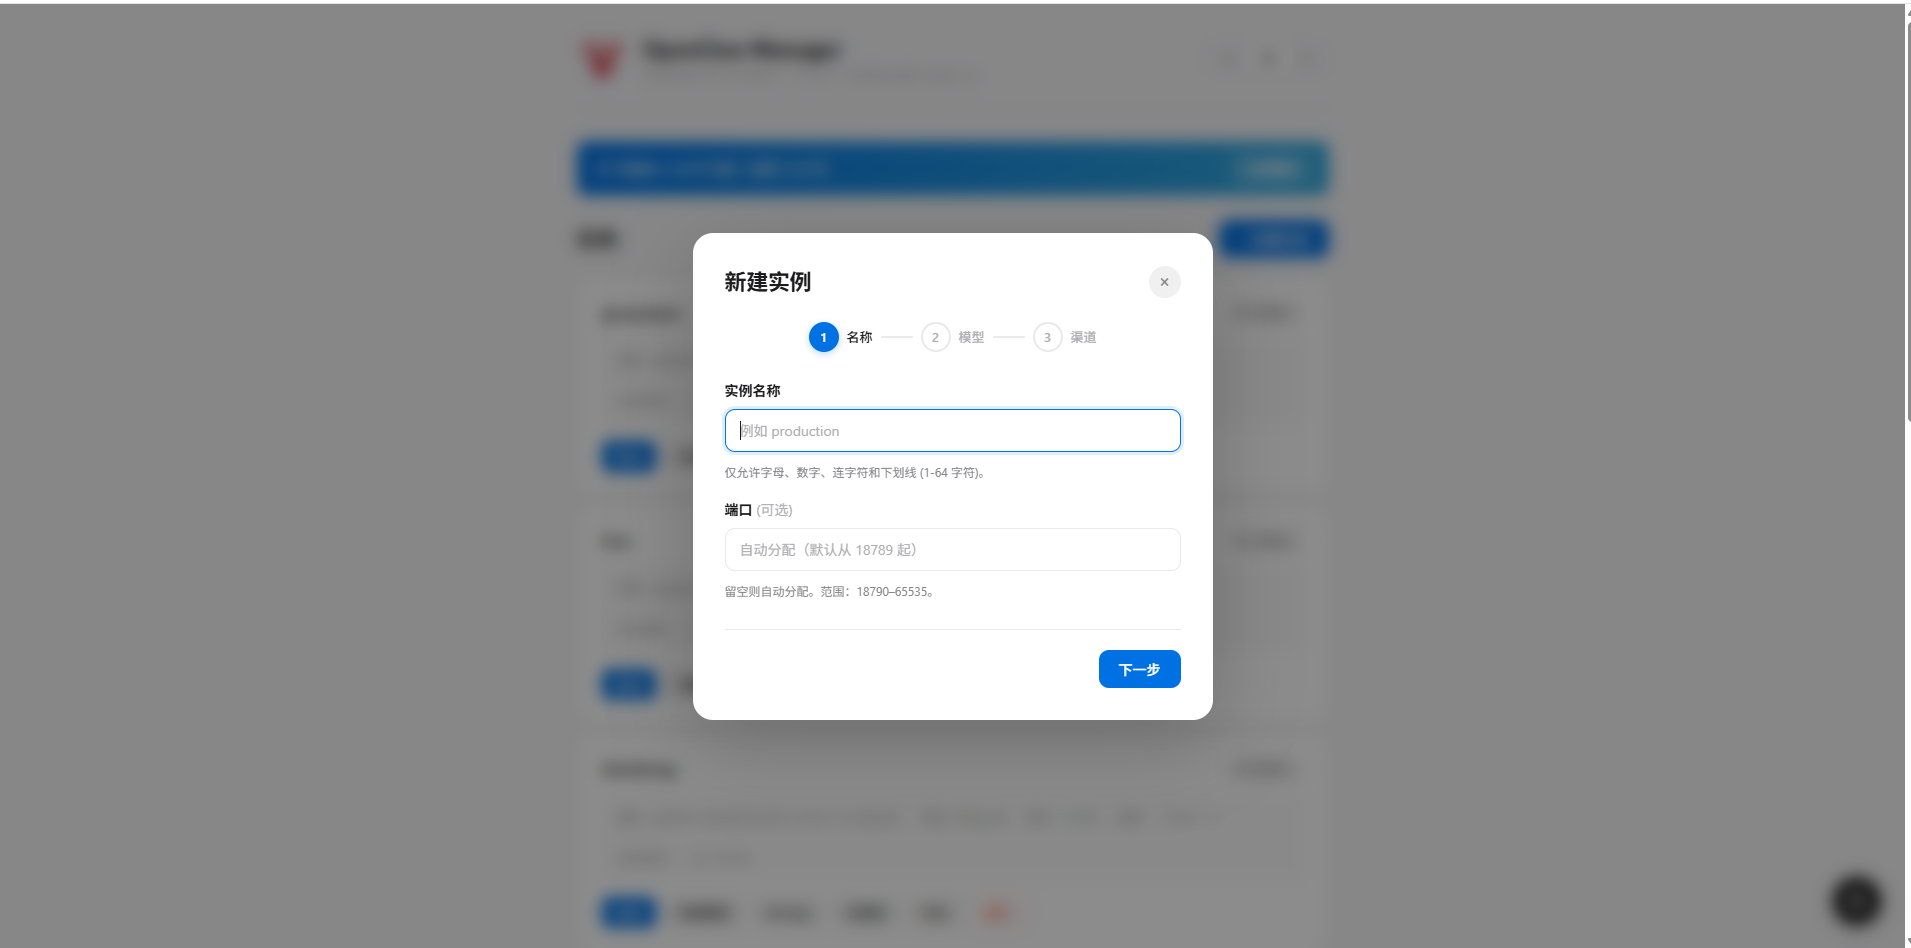
3. **インスタンス名を入力** — 例：`my-telegram-bot`（英字、数字、アンダースコア、ハイフンのみ）

<Frame>
  <img src="https://mintcdn.com/apicore/LGVVJQGJwbbJu2RM/images/integrations/openclaw-manager/manager/step-name.png?fit=max&auto=format&n=LGVVJQGJwbbJu2RM&q=85&s=940ab7cfe9efde5fd476f43cc7904074" alt="インスタンス名を入力" width="1911" height="948" data-path="images/integrations/openclaw-manager/manager/step-name.png" />
</Frame>

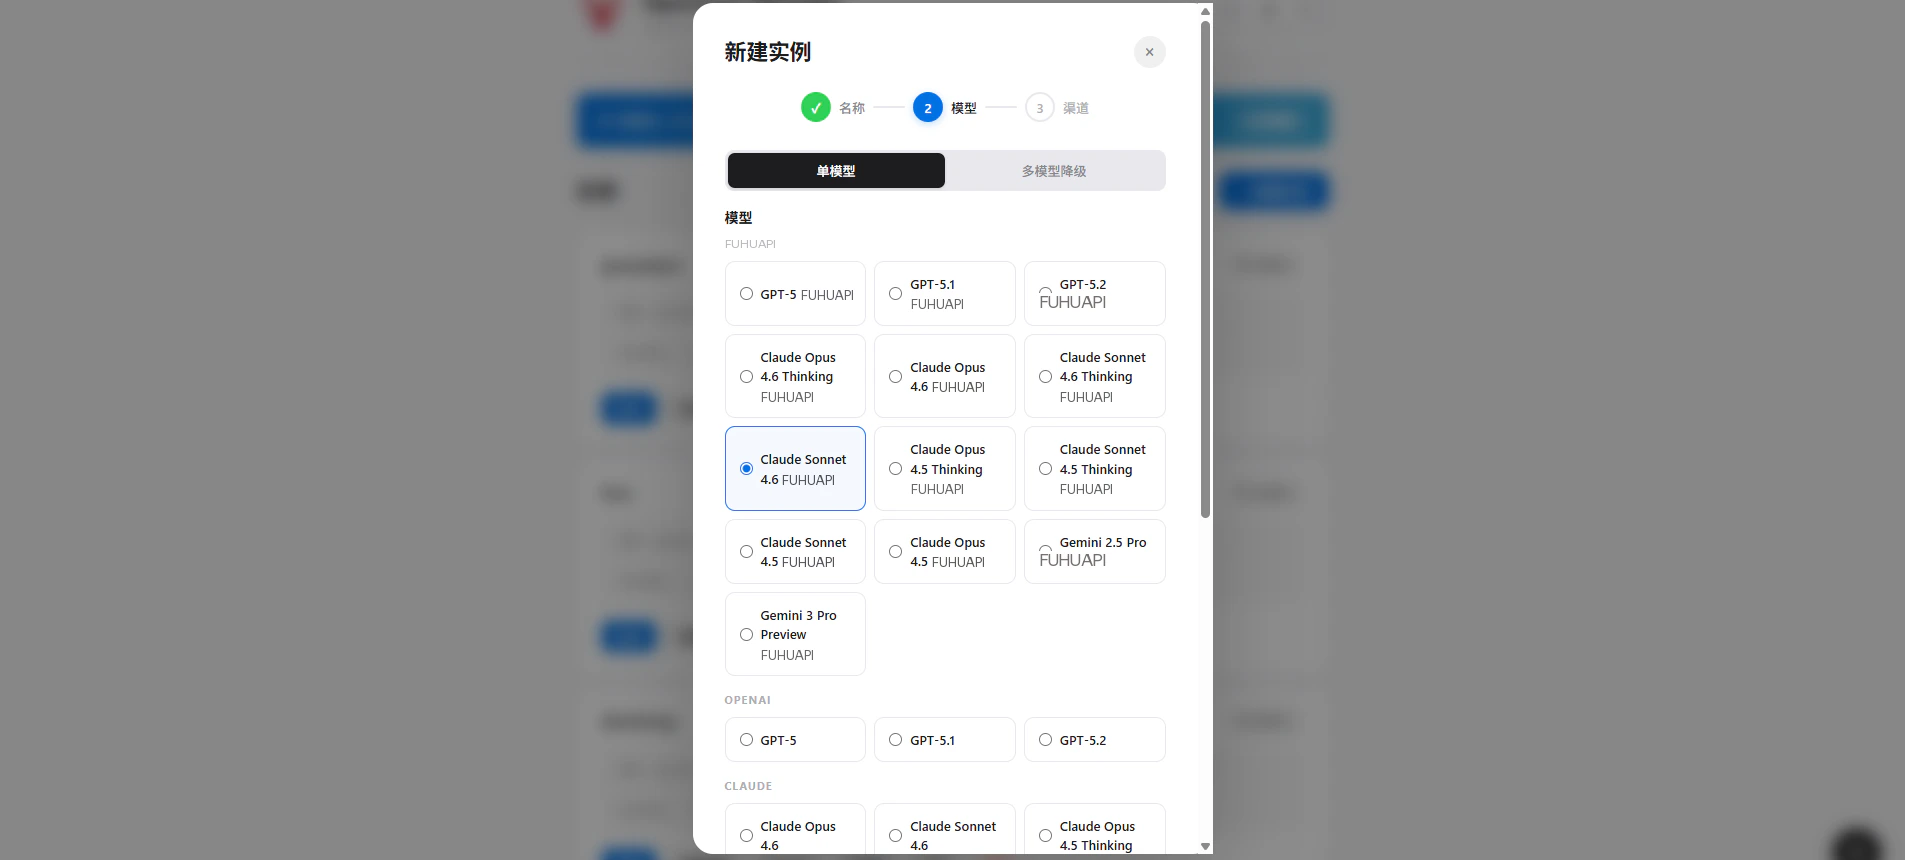
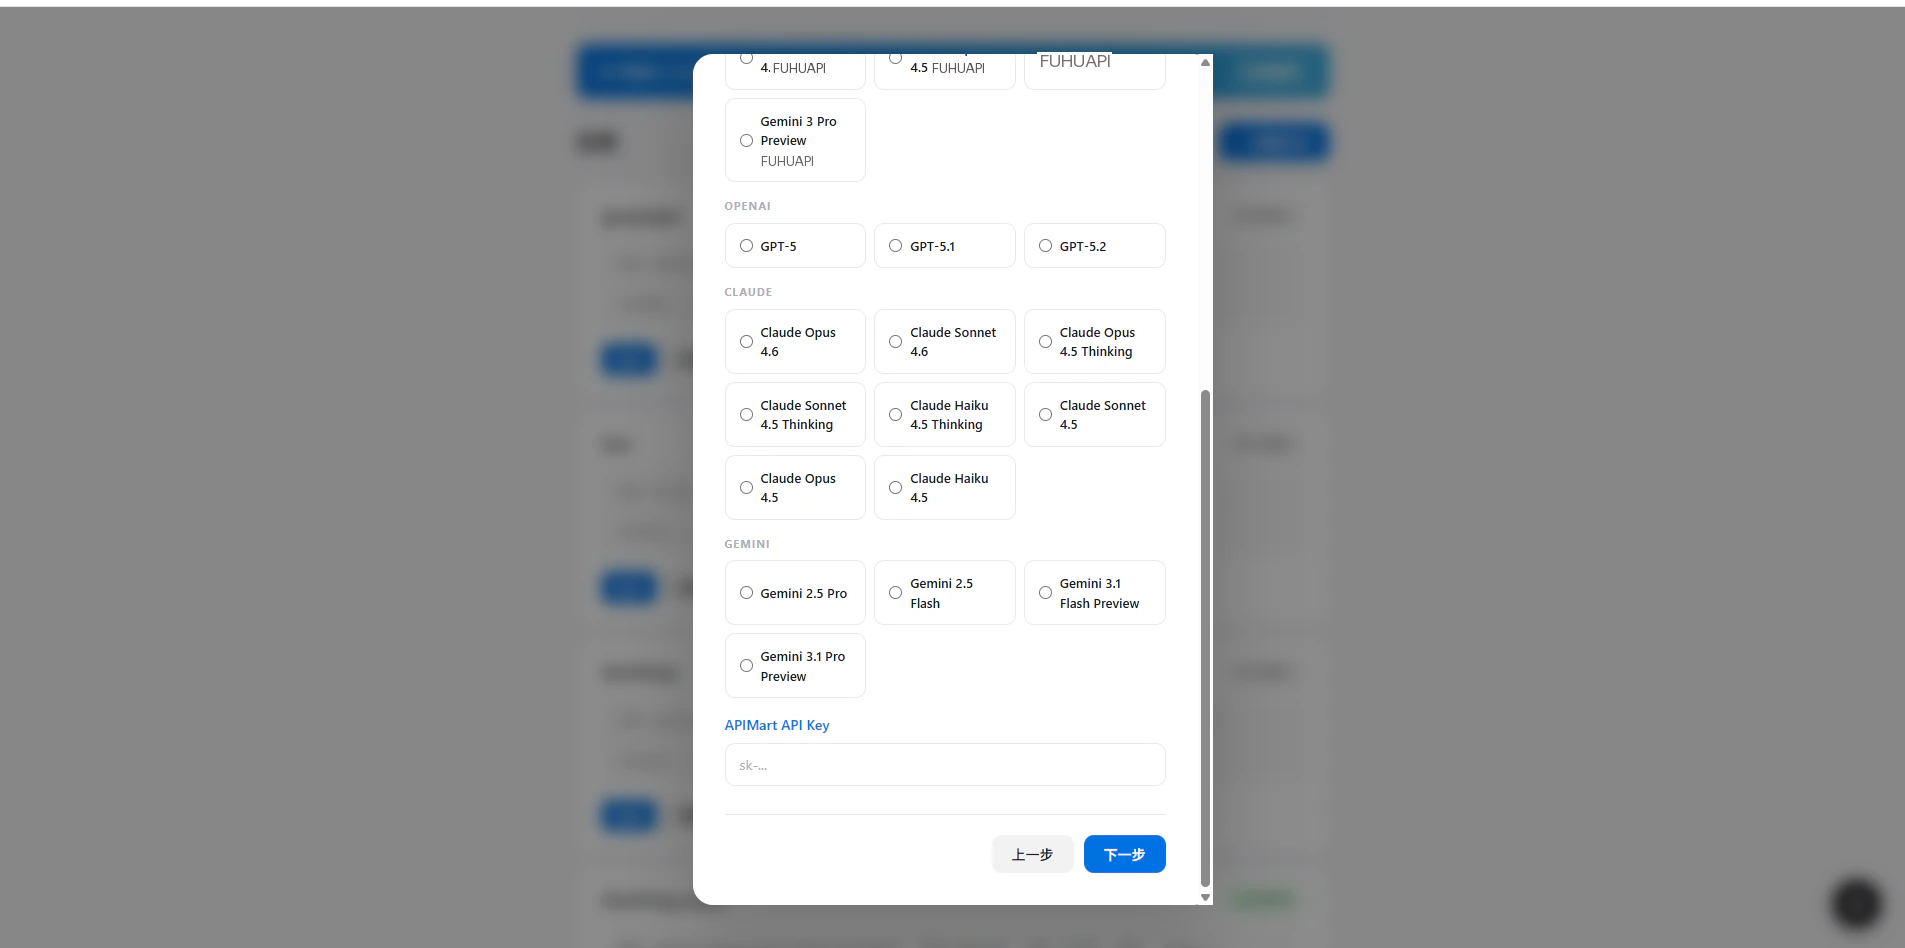
4. **AI モデルを選択** — 使用するモデルを選択

<Frame>
  <img src="https://mintcdn.com/fuhu/rGvMBqASJ4r9KbNS/images/integrations/openclaw-manager/manager/step-model.png?fit=max&auto=format&n=rGvMBqASJ4r9KbNS&q=85&s=010f34ffb9ccd05046bcd8d8432a2ecc" alt="モデルを選択" width="1905" height="860" data-path="images/integrations/openclaw-manager/manager/step-model.png" data-path="images/integrations/openclaw-manager/manager/step-model.png" />
</Frame>

5. **ElkAPI API Key を入力** — `sk-` で始まる API キーを入力
<Frame>
  <img src="https://mintcdn.com/fuhu/rGvMBqASJ4r9KbNS/images/integrations/openclaw-manager/manager/step-key.png?fit=max&auto=format&n=rGvMBqASJ4r9KbNS&q=85&s=bb8c5aa494bc674523b18fe68cc1a26e" alt="API Key を入力" width="1905" height="948" data-path="images/integrations/openclaw-manager/manager/step-key.png" data-path="images/integrations/openclaw-manager/manager/step-key.png" />
</Frame>

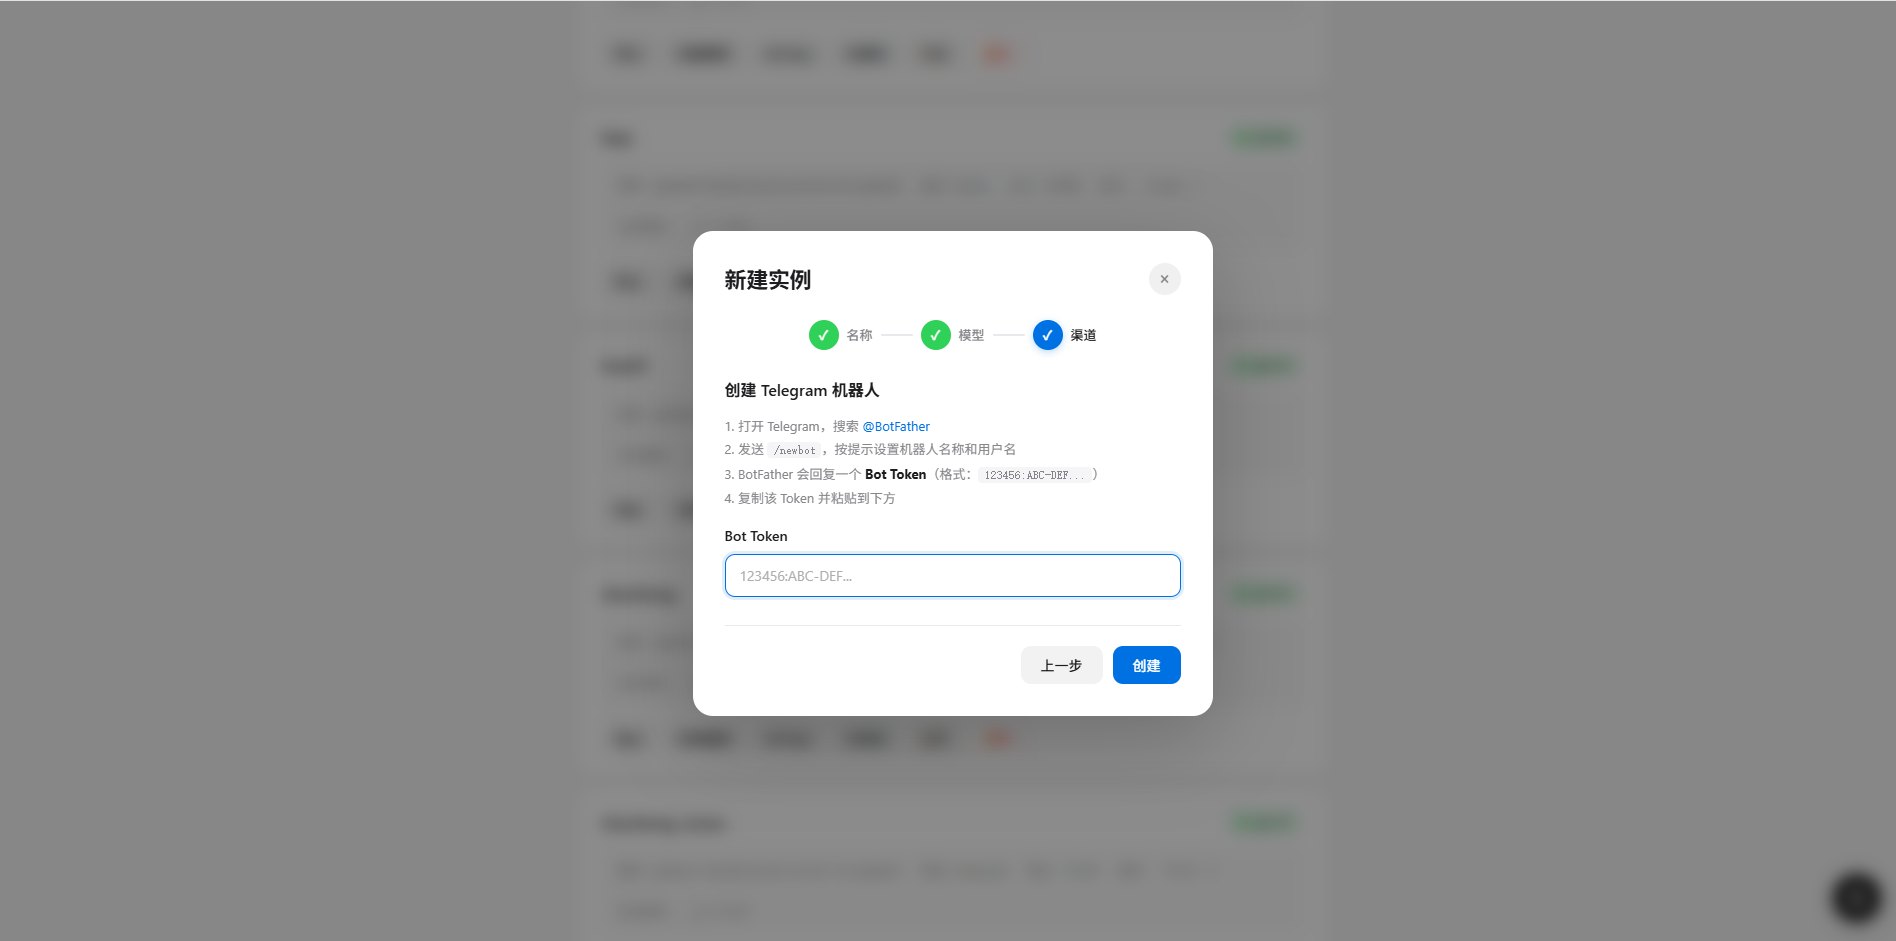
6. **チャネルを選択** — **Telegram** を選択

7. **Bot Token を貼り付け** — ステップ 1 で取得した Bot Token を貼り付け
<Frame>
  <img src="https://mintcdn.com/apicore/LGVVJQGJwbbJu2RM/images/integrations/openclaw-manager/telegram/step-channel.png?fit=max&auto=format&n=LGVVJQGJwbbJu2RM&q=85&s=18fc367a8d7a3e8e92711cff675f10a1" alt="Telegram チャネルを設定" width="1896" height="941" data-path="images/integrations/openclaw-manager/telegram/step-channel.png" />
</Frame>

<caption>*Telegram Bot Token を貼り付け*</caption>

8. **作成** をクリックしてインスタンス作成を完了

## ステップ 3：ペアリングコード連携

インスタンス作成・起動後、ペアリングコードでユーザー認証を完了：

1. Telegram で先ほど作成したボットのユーザー名を検索

2. 任意のメッセージを送信（例：「こんにちは」）

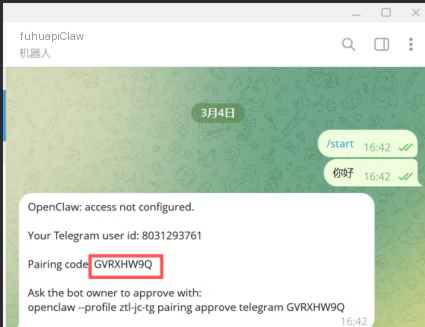
3. ボットが **8 桁のペアリングコード**（例：`DFE62DTD`）を返信

<Frame>
  <img src="https://mintcdn.com/fuhu/rGvMBqASJ4r9KbNS/images/integrations/openclaw-manager/telegram/pairing-code.png?fit=max&auto=format&n=rGvMBqASJ4r9KbNS&q=85&s=9b6366303362f07e934977d1b8f1f388" alt="ペアリングコードを取得" width="425" height="327" data-path="images/integrations/openclaw-manager/telegram/pairing-code.png" data-path="images/integrations/openclaw-manager/telegram/pairing-code.png" />
</Frame>

<caption>*ボットが返信したペアリングコード*</caption>

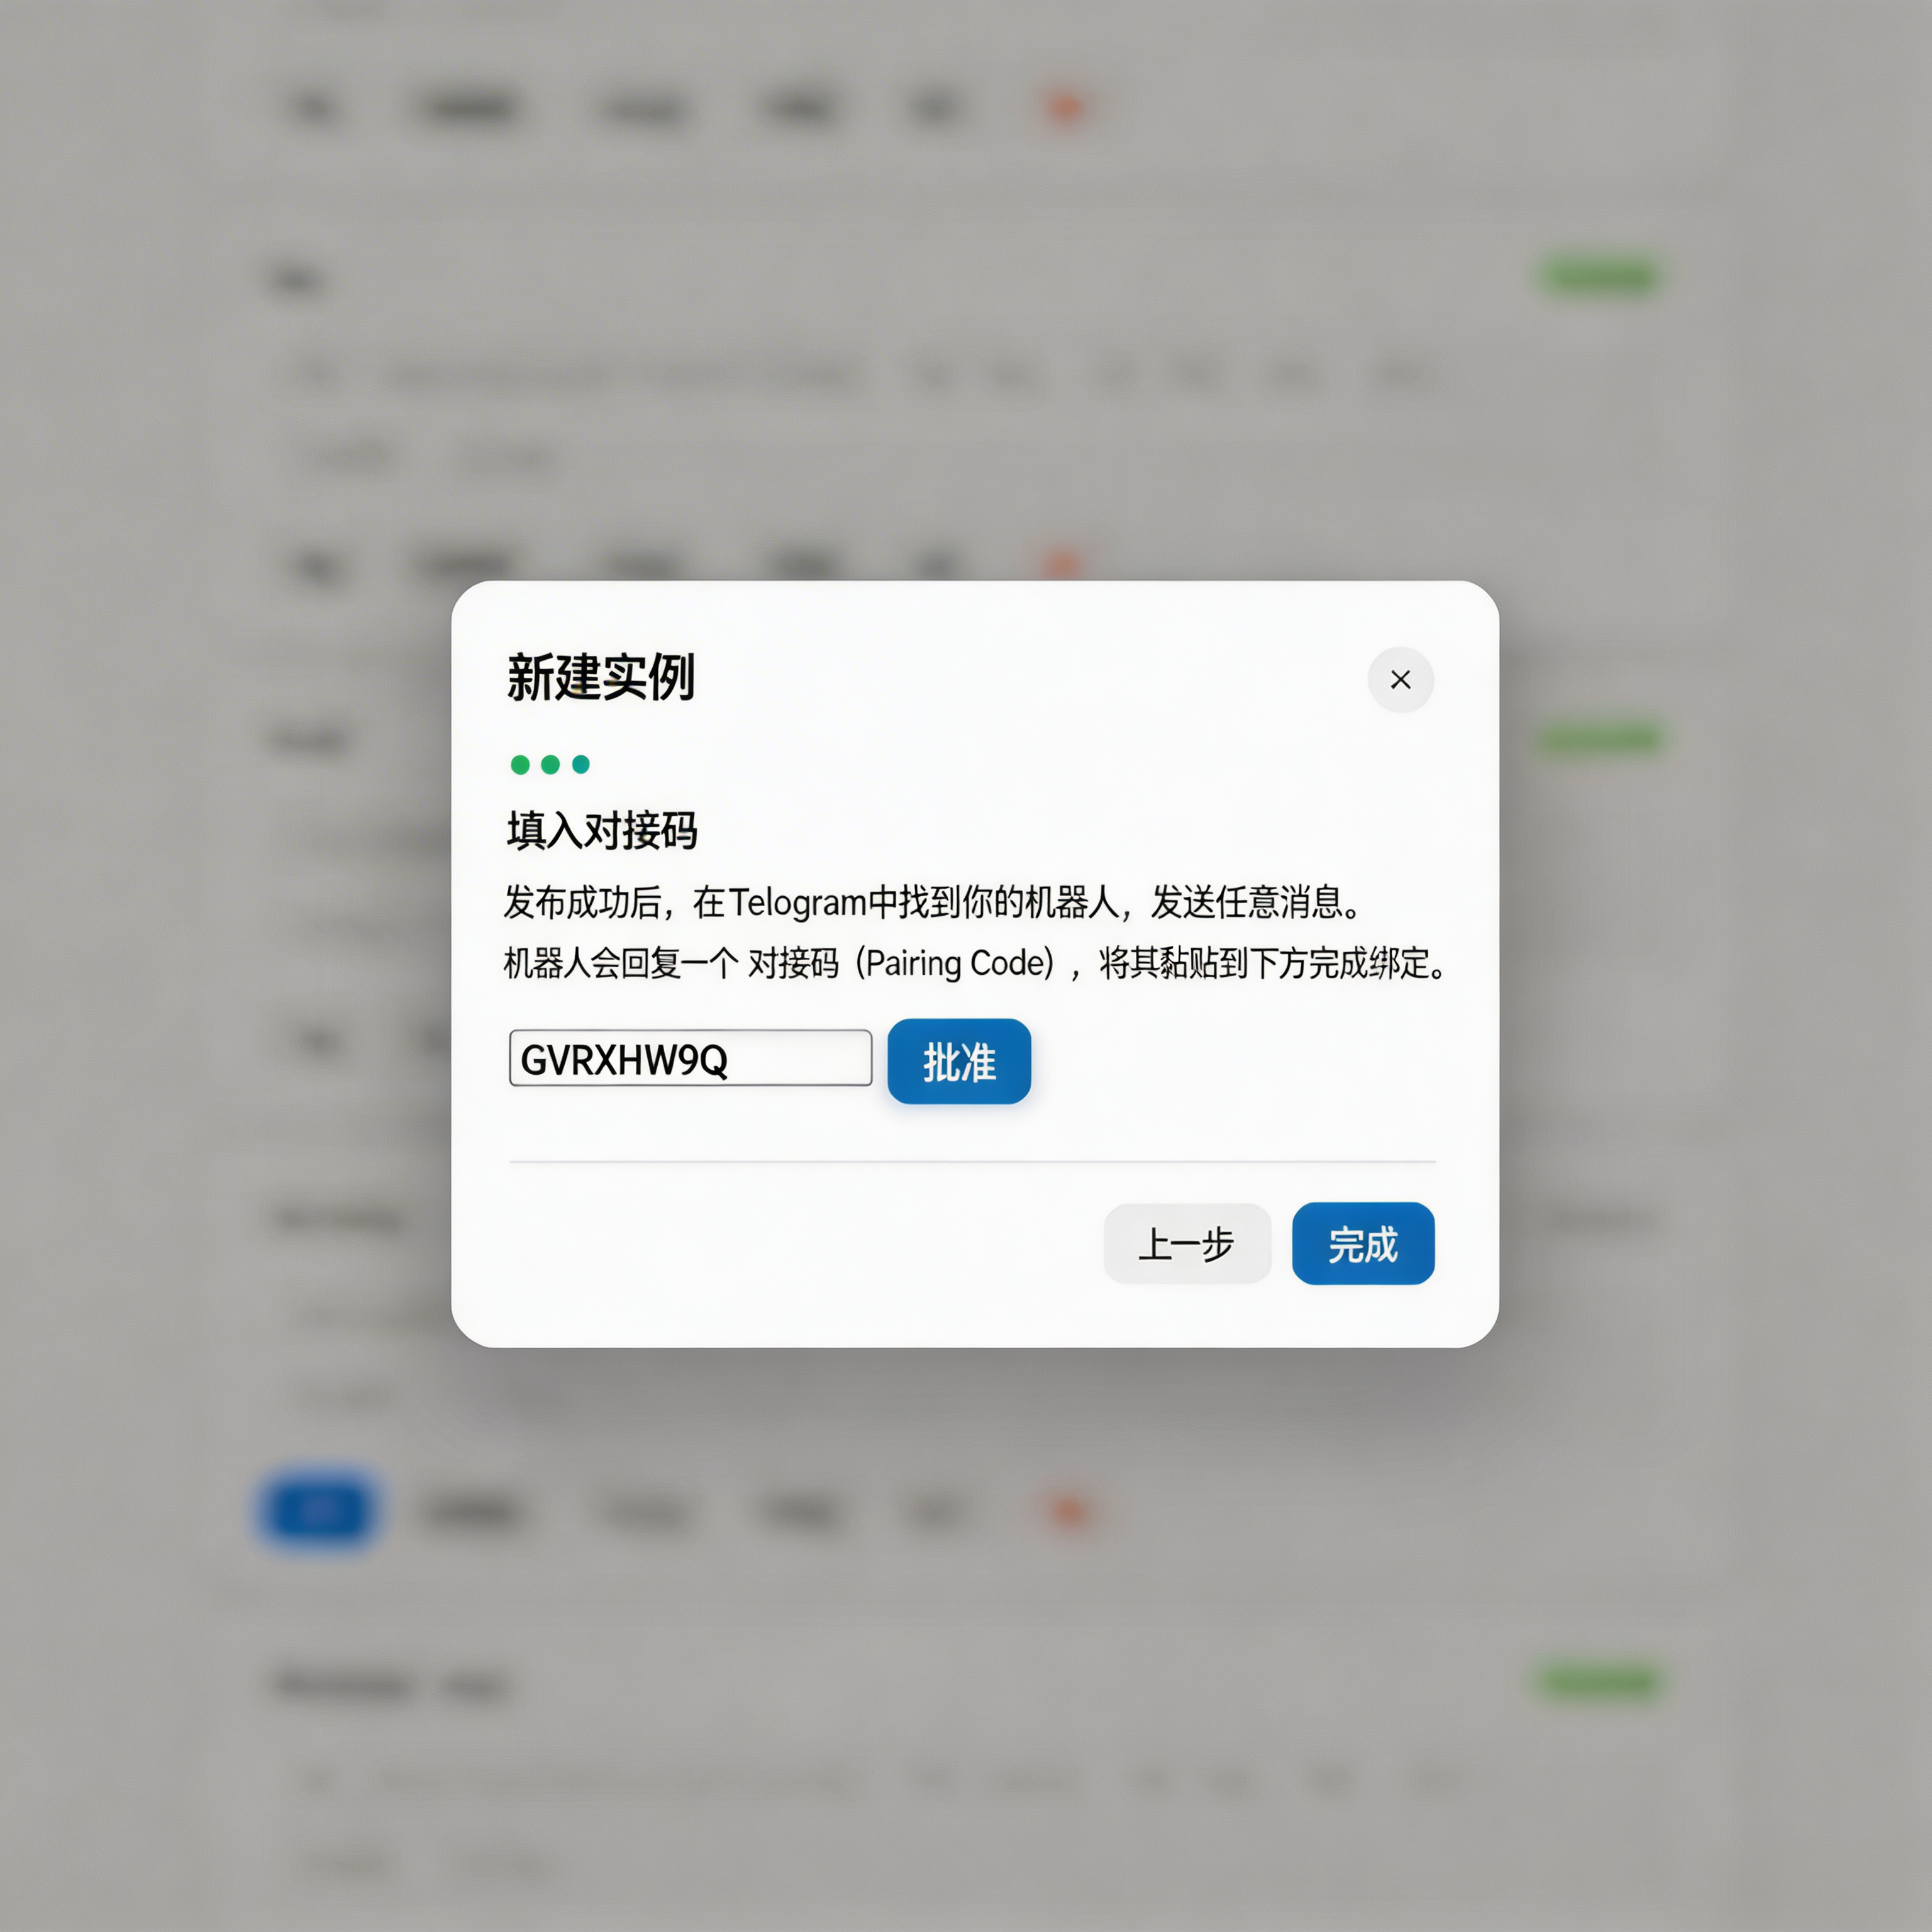
4. Manager の新規インスタンスウィザードに戻り、「**ペアリングコードを入力**」ステップでコードを入力し、「**承認**」をクリック
<Frame>
  <img src="https://mintcdn.com/apicore/LGVVJQGJwbbJu2RM/images/integrations/openclaw-manager/telegram/pairing-input.png?fit=max&auto=format&n=LGVVJQGJwbbJu2RM&q=85&s=7df57e6d48c00d2394d8f3edb7cc664c" alt="ペアリングコードを入力" width="3072" height="3072" data-path="images/integrations/openclaw-manager/telegram/pairing-input.png" />
</Frame>

<caption>*ウィザードでペアリングコードを入力して承認*</caption>

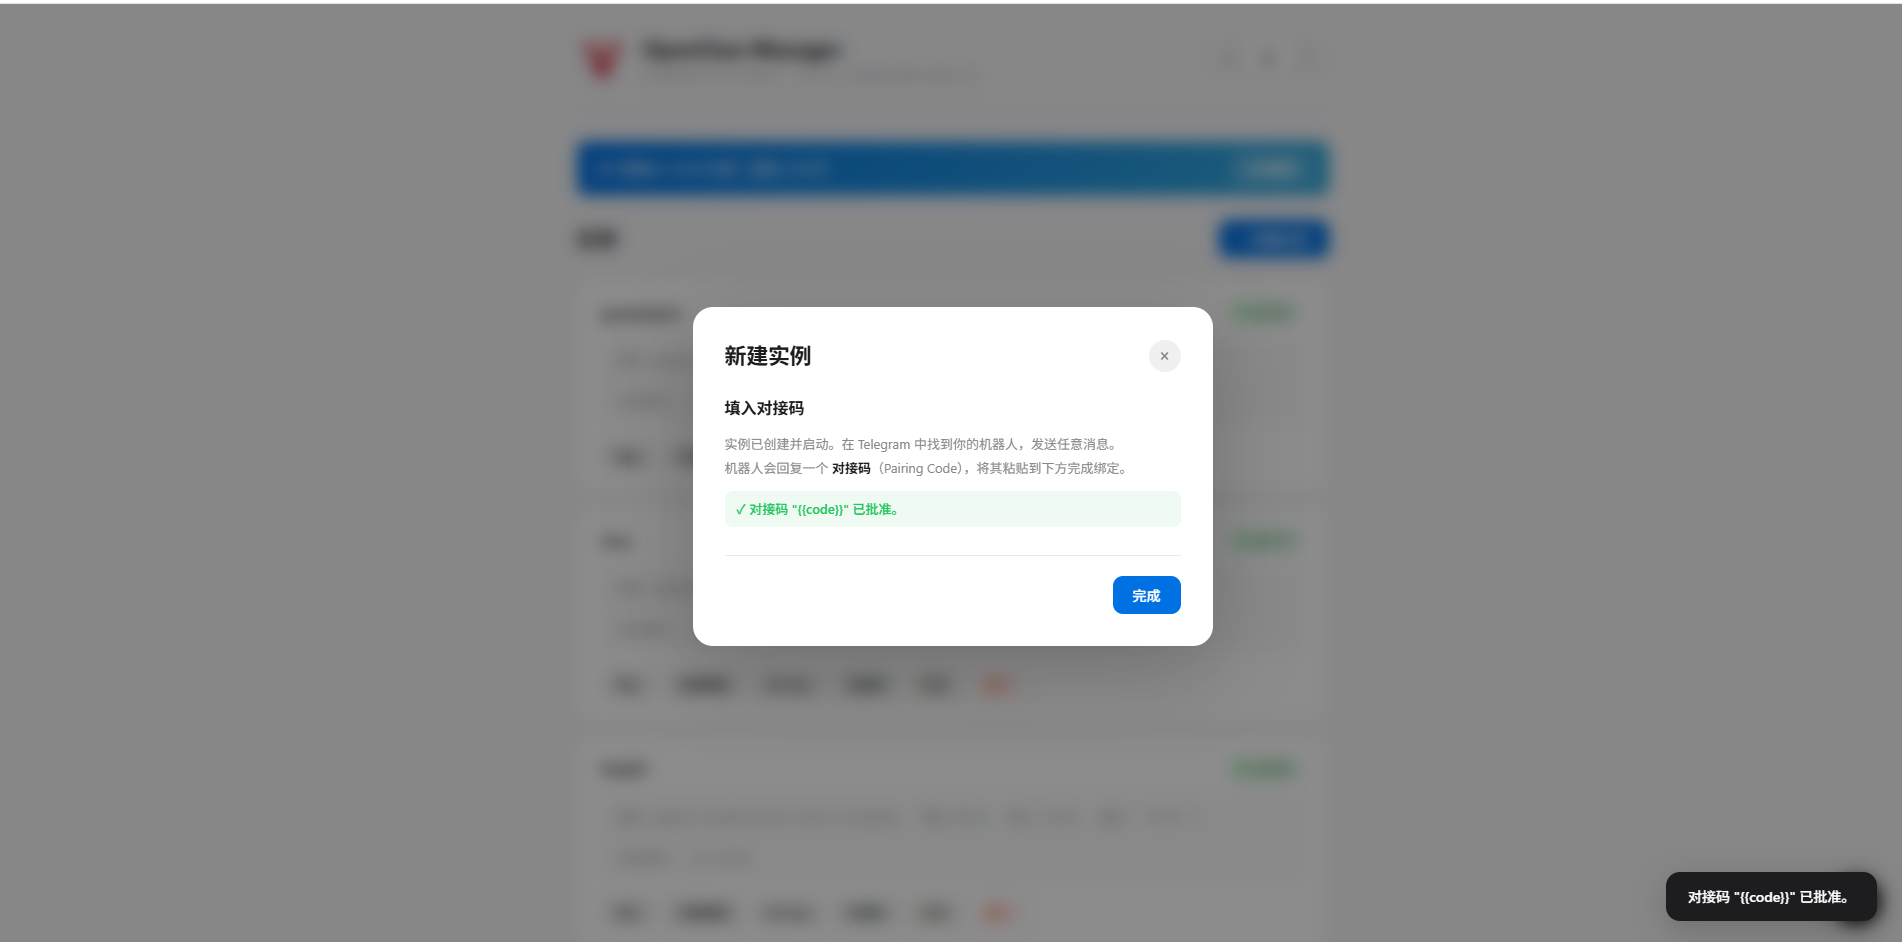
5. コードが承認されたら、「**完了**」をクリック

<Frame>
  <img src="https://mintcdn.com/apicore/LGVVJQGJwbbJu2RM/images/integrations/openclaw-manager/telegram/pairing-success.png?fit=max&auto=format&n=LGVVJQGJwbbJu2RM&q=85&s=b2f6f2219d2a09de769e388405c631db" alt="ペアリング承認成功" width="1902" height="942" data-path="images/integrations/openclaw-manager/telegram/pairing-success.png" />
</Frame>

<caption>*ペアリングコード承認成功、完了をクリック*</caption>

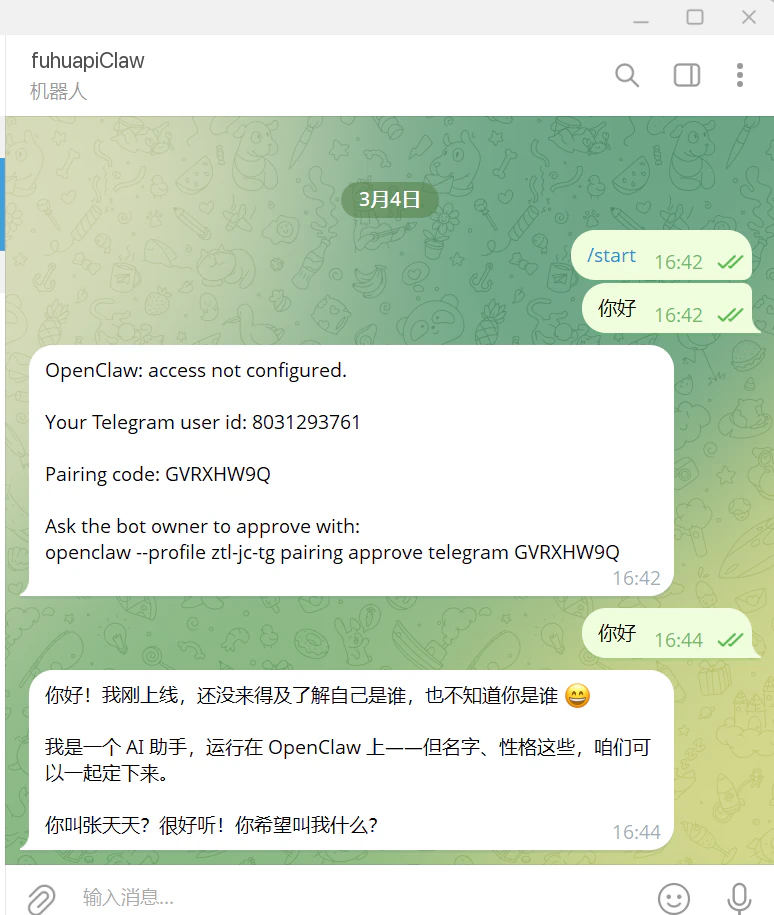
6. Telegram に戻り、再度メッセージを送信すると、ボットが AI 生成のコンテンツで応答
<Frame>
  <img src="https://mintcdn.com/fuhu/rGvMBqASJ4r9KbNS/images/integrations/openclaw-manager/telegram/chat-demo.png?fit=max&auto=format&n=rGvMBqASJ4r9KbNS&q=85&s=0c89423fed3cdafee86124baa8f27e62" alt="ボットと会話" width="774" height="915" data-path="images/integrations/openclaw-manager/telegram/chat-demo.png" data-path="images/integrations/openclaw-manager/telegram/chat-demo.png" />
</Frame>

<caption>*連携成功後、AI ボットとの通常の会話*</caption>

<Note>
  **ヒント：** ペアリングコードは Gateway のメモリに保存され、Gateway 再起動後に無効になります。コードが期限切れの場合は、ユーザーに新しいメッセージを送信してもらうだけで新しいコードを取得できます。
</Note>

## よくある質問

### Q1: ボットを作成したがメッセージに応答しない？

**解決方法：**

1. Manager でインスタンスのステータスが「**実行中**」であることを確認
2. Bot Token が正しく入力されているか確認
3. Gateway ログを確認：`~/.openclaw-<インスタンス名>/logs/gateway.log`

### Q2: ペアリングコードの承認に失敗？

**解決方法：**

* Gateway が実行中であることを確認
* ペアリングコードは大文字小文字を区別します、慎重に確認してください
* コードは Gateway 再起動後に無効になります、ユーザーに新しいメッセージを送信してもらってください

***

<Card title="OpenClaw Manager デプロイガイドに戻る" icon="arrow-left" href="/ja/integrations/platform/openclaw-manager">
  Manager のインストール、デプロイ、インスタンス管理の完全ガイドを確認
</Card>